


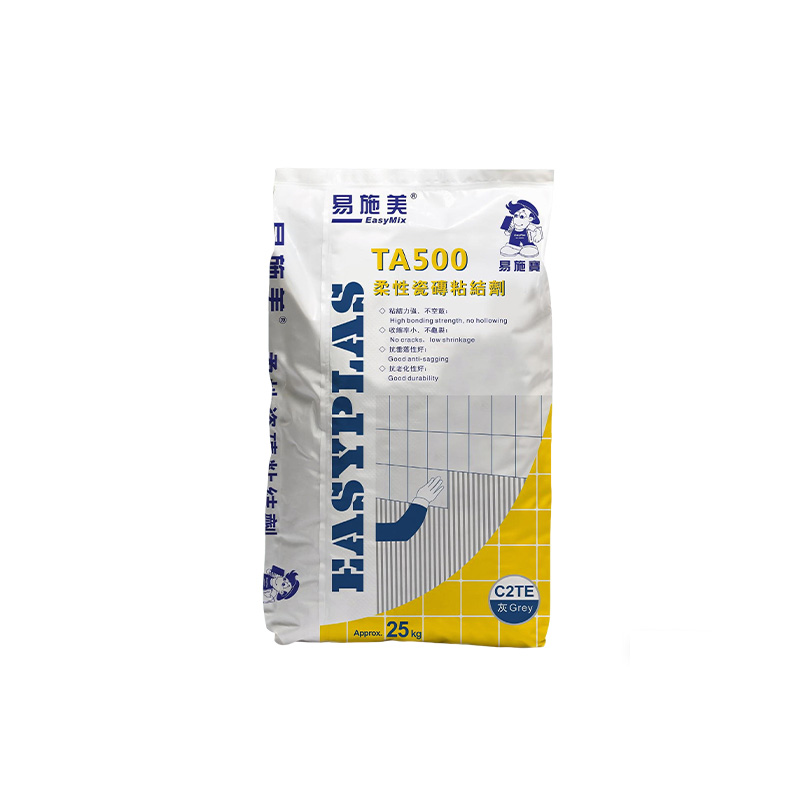
Flexible Tile Adhesive TA500 C2T
-
Detail
Flexible Tile Adhesive TA500 C2T
Product Description
EasyMix Flexible Tile Adhesive TA500 C2TE is an improved slip resistant (T) cementitious adhesive (C) with extended open time (E ) classified as C2TE classification in compliance withJC/T547 and EN 12004 . It is a premium quality designed adhesive contains of cement, specially selected aggregates and polymer additives. lt has properties of flexibility, excellent adhesion andanti-slip.
Product usage
Suitable to composite structure that create deformation of internal stress. lt has long open time and very suitable for big tiles and stones application, both for external & internal wall & floor,for toilet & kitchen.
Advantages
1.Excellent non- sag formula for wall application and long open time
2.Good workability, dual purpose, for walls and floors
3.Excellent bonding strength, with certain degree of flexibility suitable to be used incomposite structure that create deformation of internal stress
4.Good weather resistance and aging resistance, good applicabilitySpecification & Technical data: JC/T 547-2017 / BS EN 12004-1: 2017
Testing items
C 2 TTech.Data
Tensile adhesion strength ( MPa)
≥1.0
Tensile adhesion strength after water immersion ( MPa)
≥1.0
Tensile adhesion strength after heat aging ( MPa)
≥1.0
Tensile adhesion strength after freeze- thaw cycles ( MPa)
≥1.0
Open time, 30min tensile adhesion strength(MPa)
≥0.5
Slip ( mm)≥0.5
Application1,Substrate Surface Preparation
1.Remove all deteriorated concrete,dirt,oil,grease and other bond inhibiting materials fromthe surface cleaning should be done by sandblasting, high pressure water blasting, grinding or other appropriate mechanical means. In order to obtain a good adhesive effect, the concrete needs to be treated with concrete bonding agent.
2.Substrate should be clean, no hollow sound & level. Repair recessed area and holes withEasyPlas repair mortar and remove any protruded area.
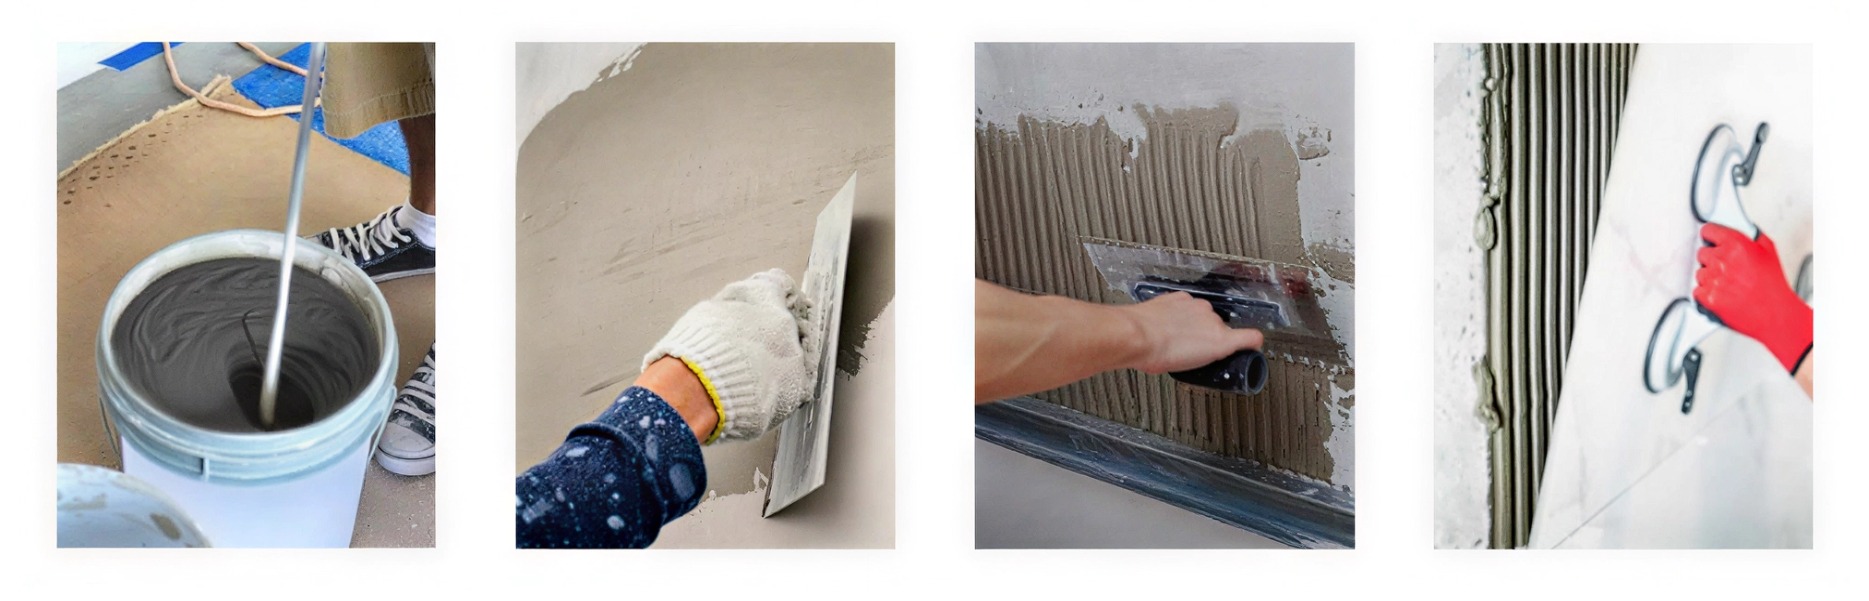
3.New concrete slabs should be damp cured and achieve require strength before application.2,Mixing
1.Place clean, potable water into a clean pail. Add pre-mixed powder gradually to the measuredquantity of water. Mix with a slow speed mixer 3~5min to a smooth uniform, homogeneous trowelable consistency. Allow mortar to stand for 1~2 minutes for additive to dissolve. Mix again 1~2min for ready to use.
3,Application
1.Ensure the saturated substrates is dry and free of surplus water. Apply mortar to the substratewith the flat side of the trowel, pressing firmly to work into surface. Comb on additioned mortar with the notched side.
Note:use the proper sized notched trowel to ensure full bedding of the tile.
2.Butter a thin layer of adhesive mortar onto the back side of the tile
3.To inspect whether the tile is fully embedded onto the substrate, just pull out one of the tile whilethe mortar still wet , check the coverage of the adhesive mortaron the back side of tile is it compliance with the requirement .
4.Adjust the tile to the required level .
5.Plastic positioning crosses are inserted into the brick joints to ensure that there are gaps betweenthe tiles to reduce stress induced damage.
6.Regular checks during application, pry the tiles out and check that the mortar coverage is full.4,Cleaning
1.Clean tools and tile work with water while mortar is fresh.
5,Grouting
1.Grout installation after a minimum of 24 hrs curing time at 21℃ .Refer to EASYPLAS Tile Grout Catalogue for more details.
-
Customer ReviewsNo comments